Goal
In this tutorial, we will use the QiChatbot in order to give Pepper the capability to chat around a subject.
Prerequisites
Before stepping in this tutorial, you should be familiar with the action notion.
For further details, see: Running Actions on Pepper.
You should also know how to use Android resources.
Let’s start a new project
For further details, see: Creating a robot application.
Conversational topics are stored in .top files in the raw resources. A topic file contains rules the robot uses while conversing with a human.
| Step | Action |
|---|---|
Add a new topic to the resources In Android Studio, choose File > New > Chat topic. |
|
Enter greetings for the File name. Then click on the Create button. The greetings.top file is added to your |
|
In the greetings.top file, add the following code: topic: ~greetings()
concept:(hello) [hello hi hey "good morning"]
u:(~hello) ~hello
More details about this QiChat code The u:(human input) robot answer
When the robot hears the input, he says the specified answer. The Note To discover how to design much more sophisticated topics, see: QiChat - Syntax. |
Your topic file is now ready and we will see how to use it.
Topics are represented by the Topic class.
We will use the TopicBuilder class to build one.
Put the following code in the onRobotFocusGained method:
// Create a topic.
val topic: Topic = TopicBuilder.with(qiContext) // Create the builder using the QiContext.
          .withResource(R.raw.mimic_animal) // Set the topic resource.
          .build() // Build the topic.
// Create a topic.
Topic topic = TopicBuilder.with(qiContext) // Create the builder using the QiContext.
                          .withResource(R.raw.greetings) // Set the topic resource.
                          .build(); // Build the topic.
We will use the created Topic in a QiChatbot.
Put the following code in the onRobotFocusGained method:
// Create a new QiChatbot.
val qiChatbot: QiChatbot = QiChatbotBuilder.with(qiContext)
          .withTopic(topic)
          .build()
// Create a new QiChatbot.
QiChatbot qiChatbot = QiChatbotBuilder.with(qiContext)
        .withTopic(topic)
        .build();
We used the previously created Topic here!
Now, we will use the QiChatbot in a Chat action.
Add a Chat field in your MainActivity:
// Store the Chat action.
private var chat: Chat? = null
// Store the Chat action.
private Chat chat;
Let’s use the Chat interface;
create it in the onRobotFocusGained method:
// Create a new Chat action.
chat = ChatBuilder.with(qiContext)
        .withChatbot(qiChatbot)
        .build()
// Create a new Chat action.
chat = ChatBuilder.with(qiContext)
        .withChatbot(qiChatbot)
        .build();
The Chat interface has a addOnStartedListener method that allows
us to be notified when the Chat action starts.
We will use it to log to the console:
// Add an on started listener to the Chat action.
chat?.addOnStartedListener { Log.i(TAG, "Discussion started.") }
// Add an on started listener to the Chat action.
chat.addOnStartedListener(() -> Log.i(TAG, "Discussion started."));
Do not forget to remove this listener on Chat in the
onRobotFocusLost method:
// Remove on started listeners from the Chat action.
chat?.removeAllOnStartedListeners()
// Remove on started listeners from the Chat action.
if (chat != null) {
    chat.removeAllOnStartedListeners();
}
We can now run the Chat in the onRobotFocusGained method:
// Run the Chat action asynchronously.
val chatFuture: Future<Void> = chat.async().run()
// Run the Chat action asynchronously.
Future<Void> chatFuture = chat.async().run();
And display a log trace indicating that the Chat finished with error.
// Add a lambda to the action execution.
chatFuture.thenConsume { future ->
    if (future.hasError()) {
        Log.e(TAG, "Discussion finished with error.", future.error)
    }
}
// Add a lambda to the action execution.
chatFuture.thenConsume(future -> {
    if (future.hasError()) {
        Log.e(TAG, "Discussion finished with error.", future.getError());
    }
});
![]() The sources for this tutorial are available on GitHub.
The sources for this tutorial are available on GitHub.
Install and run the application.
For further details, see: Running an application.
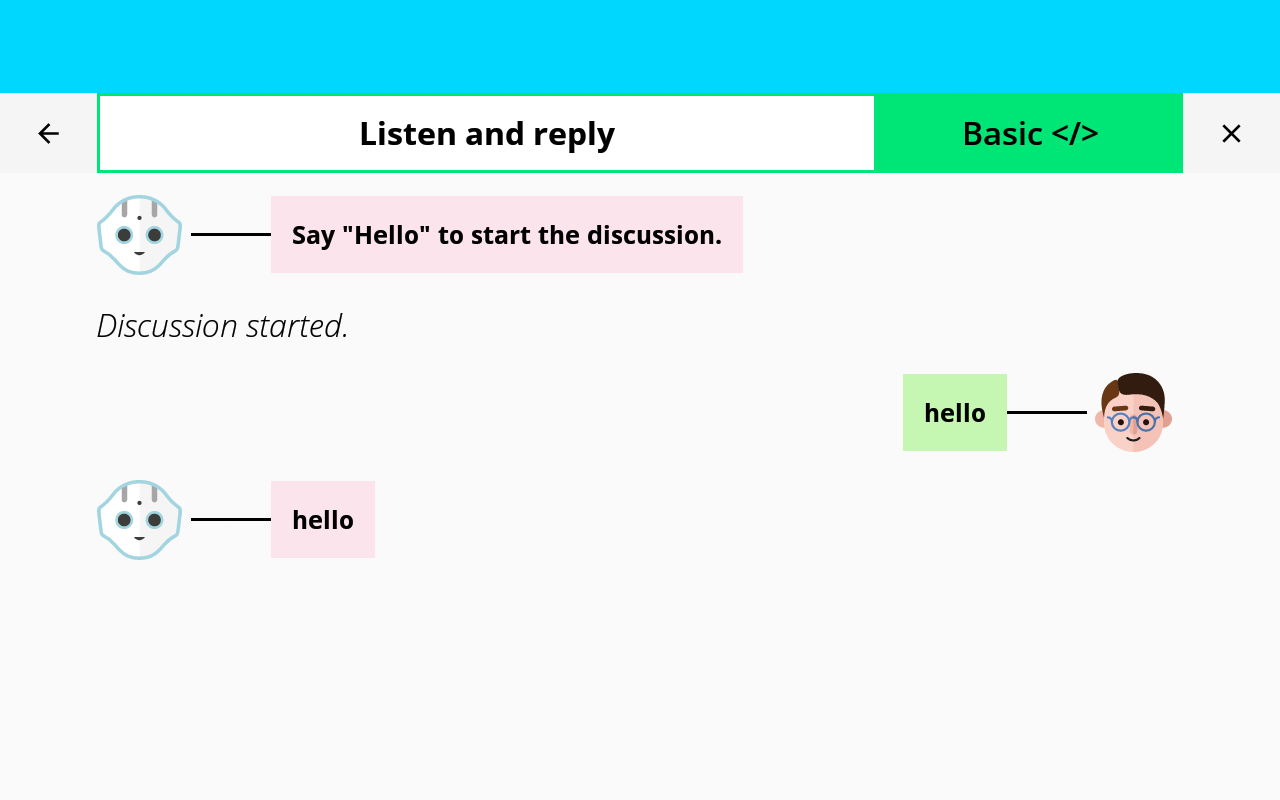
Choose “Listen and reply”.
The log trace “Discussion started.” is displayed in the console.
Say one of the following sentences:
hello,
hi,
hey,
good morning.
Pepper responds one of these sentences.
If you say one again, Pepper will change his answer.
You are now able to have a Chat with Pepper!