To develop an Android robot application, you need to set up your development environment as follows.
Make sure your computer runs one of the supported Operating System:
| OS | Version |
|---|---|
| Linux | Ubuntu 16.04 Xenial Xerus - 64-bit only |
| Windows | Microsoft Windows 10 - 64-bit only |
| Mac | Mac OS X 10.12 Sierra |
| Step | Version |
|---|---|
| Install Android Studio | 3.4 or Higher |
| Get Android SDK and Build-Tools | The latest (recommended) – minimum 6.0 (API 23) – |
| Enable Virtualization | |
| Check Bonjour version | 2.0.2.0 or later |
| Windows only: check C++ Redistributable Packages | |
| Get Pepper SDK Plugin | The latest |
| Get Robot SDK and tools | The latest |
Robot application runs on the built-in Android tablet of the robot and therefore to develop the application, Android Studio must be installed.
| Requirements | |
|---|---|
| Android Studio | Version 3.4 or Higher We recommend installing the latest stable version. |
| Java Development Kit (JDK) | Version 1.8 or Higher |
To install Android Studio, follow the installation guide available here: http://developer.android.com/sdk/index.html
To develop an Android application, you need to install Android SDK and its Build-Tools:
| Step | Action |
|---|---|
From Android Studio:
The SDK Manager appears. 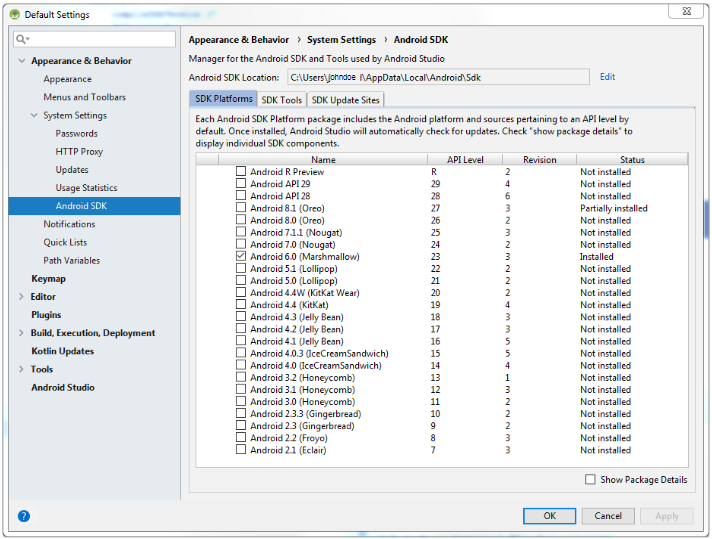
|
|
| Check the Show Package Details. | |
Select the latest Android SDK Platform, then click the Apply button, and confirm the change. When prompted, accept the license agreement and let the Component Installer process the installation. 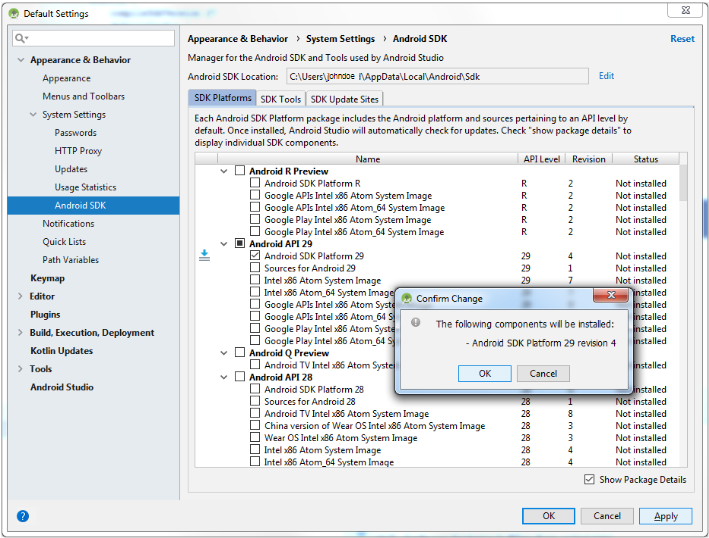
Note Here we chose the Android 10.0 > Android SDK Platform 29, you could choose a higher version if any, the latest the better. The minimum required version is Android SDK Platform 23. |
|
Click the SDK Tools tab, check the Show Package Details, and select Android SDK Build-Tools with the same version, then click the Apply button. 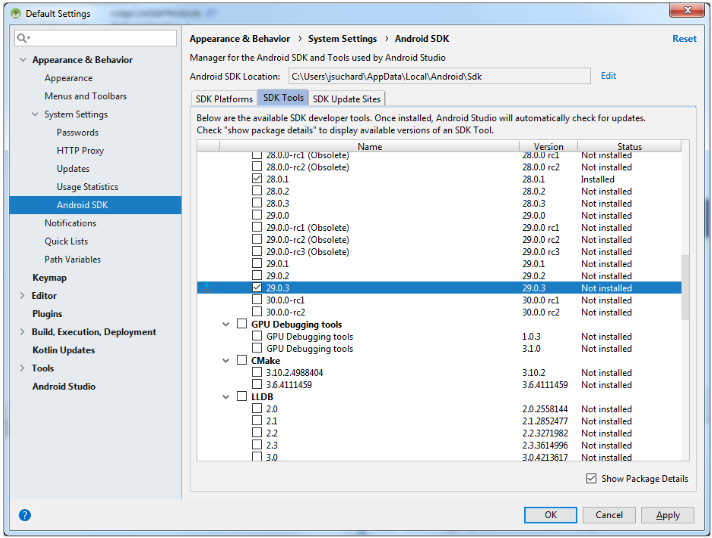
|
Warning
Virtualization is required to launch the Robot Emulator.
Make sure Virtualization Technology is enabled in BIOS.
You will need Bonjour to easily connect to a robot.
Make sure Bonjour version 2.0.2.0 or later is installed on your computer. On Mac and Ubuntu, it should be installed by default, but it is not the case on Windows.
On Windows, make sure you follow the Additional steps for Windows section.
Windows configuration requires additional actions:
To download and install Bonjour for Windows, please visit its official site: http://support.apple.com/kb/DL999
On windows 10, make sure you have installed:
| Step | Action |
|---|---|
Microsoft Visual Studio C++ 2010 x64 Redistributable Package You can download the |
|
Microsoft Visual Studio C++ 2013 Redistributable Package (x64) You can download the |
This section shows how to install Pepper SDK Plugin in Android Studio for developing robot applications.
Note
Before installing Pepper SDK Plugin, you should have completed the previous steps, i.e. downloaded and installed: Android Studio, Java Development Kit (JDK), Android Tools and Bonjour.
| Step | Action |
|---|---|
| From Android Studio choose File > Settings…. | |
Select Plugins sub-menu. 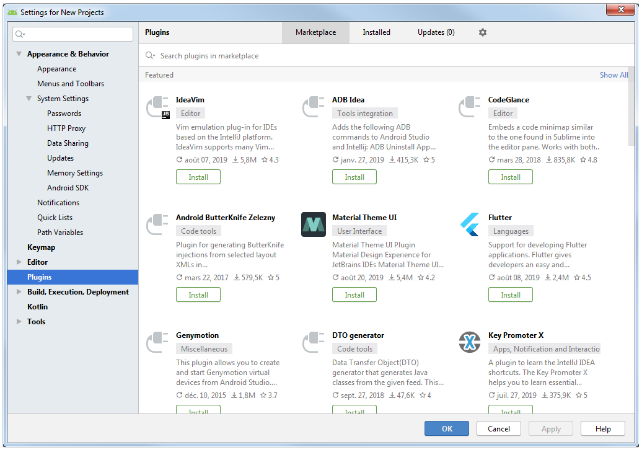
|
|
| Enter “Pepper” in the search bar, in order to find Pepper SDK. | |
Select Pepper SDK and click the Install button. 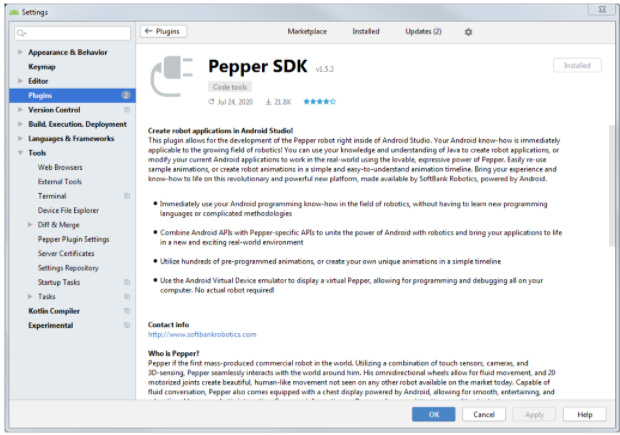
Troubleshooting - China only: Pepper SDK does not appear, so Get Pepper SDK Plugin from disk. |
|
| Restart Android Studio. | |
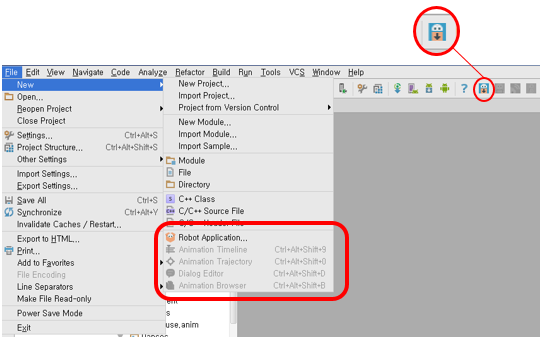
Check the result: browsing Android Studio’s menu, you should see the following options:
Robot SDK Manager Note Can’t see the Robot SDK Manager Choose View > Toolbar and make sure it is checked. |
Once Pepper SDK Plugin is installed, your last step for setting up the environment is to download the tools for developing robot application.
China only: make sure you have Set the local options.
| Step | Action |
|---|---|
Choose Tools > Pepper SDK > Robot SDK Manager. You can also click the Robot SDK Manager Note Can’t see the Robot SDK Manager Choose View > Toolbar and make sure it is checked. |
|
Check the target API version you want to develop your robot application in and click the Apply button. 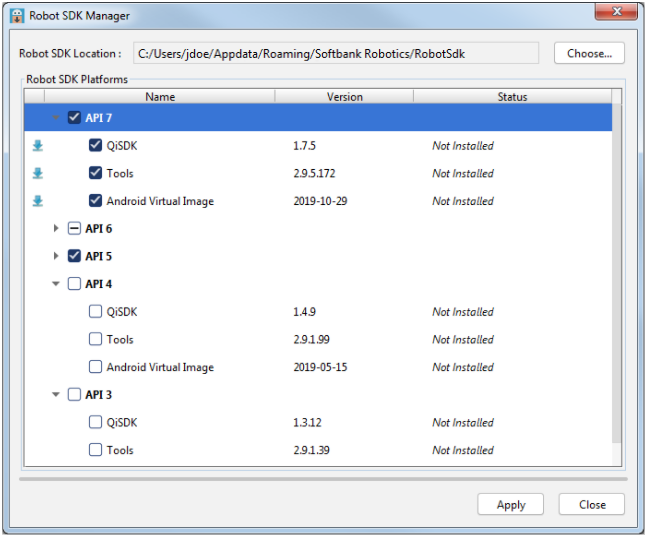
|
Warning
Each time you download a new target API version, you must robotify your project again.
For further details, see: Creating a robot application.
Note
Windows only
To ensure compatibility, Emulator.29.0.11 is automatically installed.
| AVD | (Android Virtual Device): AVD system image same as the robot tablet image. Provides x86 and armeabi architectures. |
| Tools | Robot Emulator and tools for developing robot application, such as Robot Viewer, Robots Browser, Trajectory, etc. |
On Ubuntu
The message /dev/kvm is not found appears.
Go into the BIOS and enable virtualization Technology.
For further details, see: Enable Virtualization.
On Windows 10
The following message appears:
C:\Users\jdoe\AppData\Local\Android\Sdk\emulator\emulator-x86.exe: invalid option -- '-enable-whpx'
Workaround
In the C:\Users\[yourUserName]\.android folder, find or create
a file called advancedFeatures.ini.
Add the following line to advancedFeatures.ini:
WindowsHypervisorPlatform = off
Connection to a real or virtual robot is impossible and log contains:
java.lang.UnsatisfiedLinkError: C:\Users\[yourUserName]\AppData\Local\Temp\qi.dll
The error may be caused by space character your session name [yourUserName].
Workaround
Make sure that your session name [yourUserName] doesn’t contain any space character.
Black screen on AVD (virtual tablet)
Workaround
If the virtual tablet of the emulated robot displays a black screen, try: Modifying the AVD graphical acceleration type.
On Mac OS
Black screen on AVD (virtual tablet)
Workaround
Make sure that you have installed:
China only
| Step | Action |
|---|---|
Download the plugin 1.3.7 on your local disk. https://qisdk.softbankrobotics.com.cn/sdk/extra/peppersdk-1.3.7.zip |
|
| From Android Studio choose File > Settings…. | |
Select Plugins sub-menu. 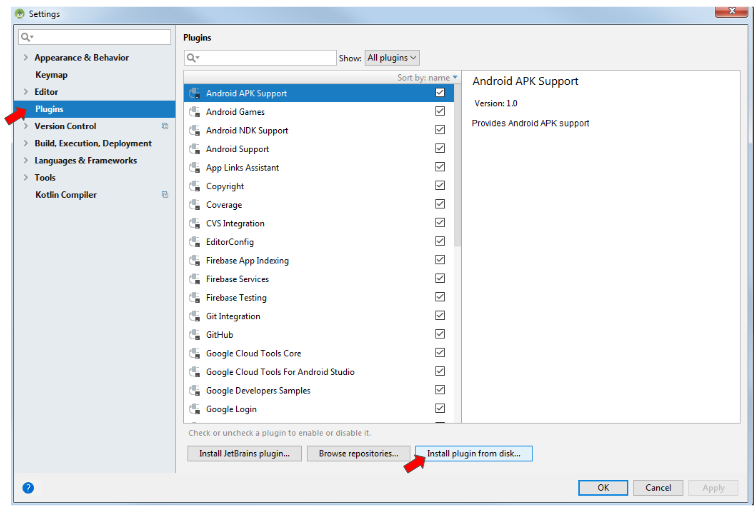
|
|
Click the Install plugin from disk… button. 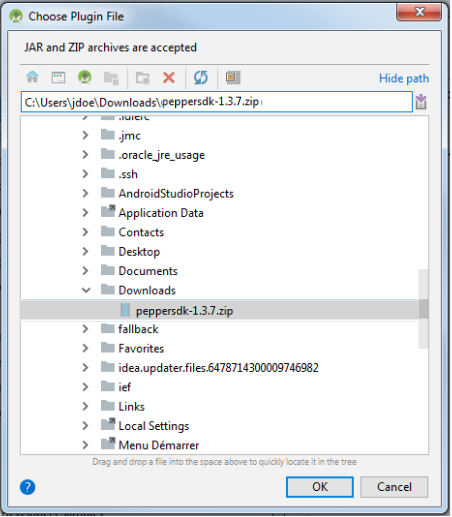
|
|
Select peppersdk-1.3.7.zip and click the OK button. |
|
| Restart Android Studio. | |
Check the result: browsing Android Studio’s menu, you should see the following options:
Robot SDK Manager Note Can’t see the Robot SDK Manager Choose View > Toolbar and make sure it is checked. |
China only
| Step | Action |
|---|---|
| From Android Studio choose File > Settings…. | |
Select Tools > Pepper Plugin Settings sub-menu. 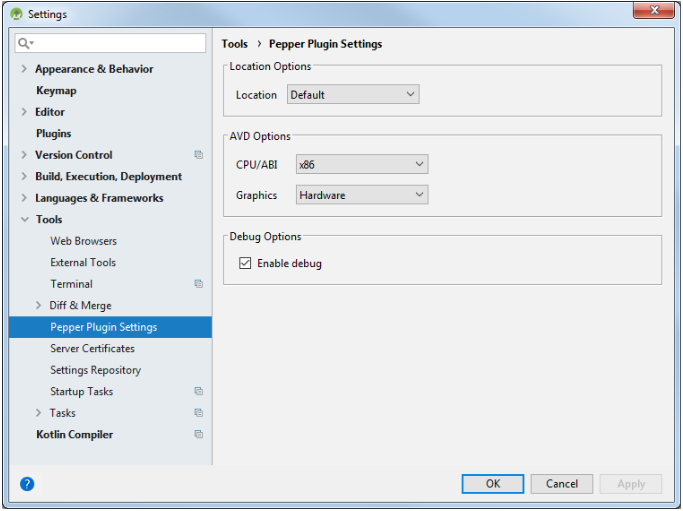
|
|
Set the Location to China. |
Next step: Get Robot SDK and tools.
If your computer hardware seems not able to display the emulator:
| Step | Action |
|---|---|
| From Android Studio choose File > Settings…. | |
Select Tools > Pepper Plugin Settings sub-menu.
|
|
Set the Graphics option to Software. |
 should also appear in the toolbar.