Goal
In this tutorial, we will synchronize Pepper’s speech with its animation, using labels in an Animation.
Prerequisites
Before stepping in this tutorial, you should:
Let’s start a new project
For further details, see: Creating a robot application.
We could create a new animation from scratch, using the Animation Editor or the Trajectory Editor, but for this tutorial, let’s select a predefined one. We will then add labels to the animation.
| Step | Action |
|---|---|
In Android Studio, choose File > New > Import animation… The Animation Browser / Viewer opens: 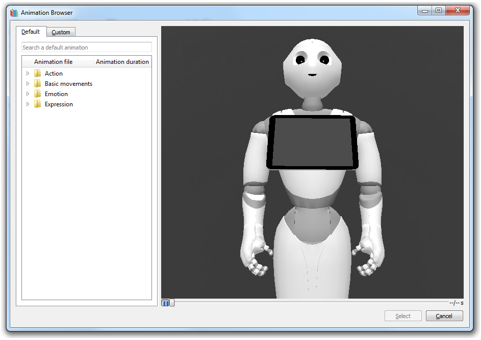
|
|
In Action > Dances, select the dance_b001 animation and click the Select button. Result: The dance_b001.qianim file is added to your res/raw folder and opens. |
|
Add a label layer and create the following labels:
For further details, see: Creating labels. |
|
| Close the animation file window and return to your MainActivity window. |
From this animation file we must now build an Animation object.
To do this, we use the AnimationBuilder class.
In the onRobotFocusGained method, add the following code:
// Create an animation.
val animation: Animation = AnimationBuilder.with(qiContext) // Create the builder with the context.
                                .withResources(R.raw.dance_b001) // Set the animation resource.
                                .build() // Build the animation.
// Create an animation.
Animation animation = AnimationBuilder.with(qiContext) // Create the builder with the context.
                                      .withResources(R.raw.dance_b001) // Set the animation resource.
                                      .build(); // Build the animation.
We will animate Pepper by using the Animate interface.
Add an Animate field in your MainActivity:
// Store the Animate action.
private val animate: Animate? = null
// Store the Animate action.
private Animate animate;
Create it with an AnimateBuilder in the onRobotFocusGained method:
// Create an animate action.
animate = AnimateBuilder.with(qiContext) // Create the builder with the context.
                                .withAnimation(animation) // Set the animation.
                                .build() // Build the animate action.
// Create an animate action.
animate = AnimateBuilder.with(qiContext) // Create the builder with the context.
                                .withAnimation(animation) // Set the animation.
                                .build(); // Build the animate action.
We used the previously created Animation to set the animation Pepper will perform.
We can now run the Animate:
// Run the animate action asynchronously.
val animateFuture: Future<Void>? = animate?.async()?.run()
// Run the animate action asynchronously.
Future<Void> animateFuture = animate.async().run();
To be notified when a label is reached, let’s use the addOnLabelReachedListener method.
For this example, we will make Pepper say the name of the reached labels.
Add this before the run:
// Say the name of the reached labels
animate?.addOnLabelReachedListener { label, time ->
    // Create a Say object using the label name
    val sayLabel: Say = SayBuilder.with(qiContext)
            .withText(label)
            .build()

    // Run the Say object
    sayLabel.async().run()
}
// Say the name of the reached labels
animate.addOnLabelReachedListener((label, time) -> {
    // Create a Say object using the label name
    Say sayLabel = SayBuilder.with(qiContext)
            .withText(label)
            .build();

    // Run the Say object
    sayLabel.async().run();
});
Do not forget to remove this listener on Animate in the onRobotFocusLost method:
// Remove on label reached listeners from the animate action.
animate?.removeAllOnLabelReachedListeners()
// Remove on label reached listeners from the animate action.
if (animate != null) {
    animate.removeAllOnLabelReachedListeners();
}
![]() The sources for this tutorial are available on GitHub.
The sources for this tutorial are available on GitHub.
| Step | Action |
|---|---|
Install and run the application. For further details, see: Running an application. |
|
Choose “Mastering Animation labels”. You should observe the following:
|
That’s it! You can now synchronize events with Pepper’s animations!
