| Step | Action |
|---|---|
Choose Robot > Postures > Stand. The Robot 3D view displays this posture, but, even with the AutoKey option activated, the TimeLine is not modified. |
|
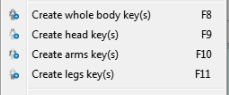
Choose Edit > Create whole body key(s). Now the keys are created for all the Actuators. |
Note
Why do I have to define an initial posture?
To create a well-defined movement, you need to define both starting and ending points of the movement.
Warning
If a starting key is not specified, the movement could surprise you, it will rely too much on the undefined initial position, so it will be unpredictable and therefore impossible to validate with certainty.
| Step | Action |
|---|---|
| Select a Frame. | |
| On the Robot 3D view, select an Actuator. | |
| Drag the wheel or the Actuator’s slider. | |
Note AutoKey option allows to register one Actuator at a time, while Edit menu registers groups of Actuators. Tip: explore the Shortcuts for more efficiency. For example, use Shift+F10 shortcut to create a left arm keys. |
You can enrich the Posture menu with your preferred ones.
| Step | Action |
|---|---|
| Select a posture you would like to reuse. | |
Choose Robot > Postures > Save current posture. A dialog Create custom posture appears. |
|
Enter a posture name then click the OK button. The posture is now available in the Robot > Postures menu. |