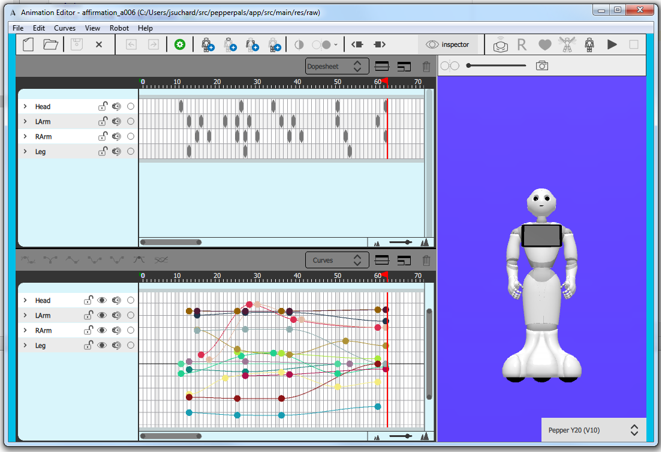
Here are few definitions about Animation Timeline and Robot 3D View. You can quickly browse them to discover the basics, or go directly to the Hello World then come back here when needed.
An Animation Timeline allows assigning different values to the Actuators of the robot along a Timeline.
By default, it is displayed using 2 different views:
Both views allow assigning a value to an Actuator for a Frame, i.e. a point on the Timeline.
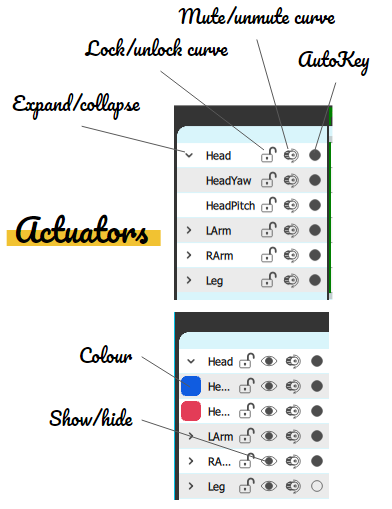
Dopesheet view displays keys as dots.
|
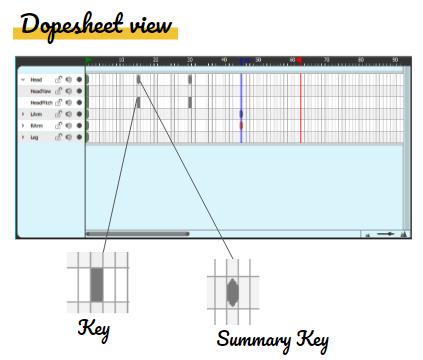
|
Curves view displays keys as points on a curve. A curve represents the variation of the value assigned to the related actuator. It shows the interpolation between two keys. |
|
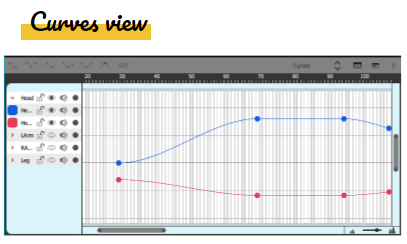
|
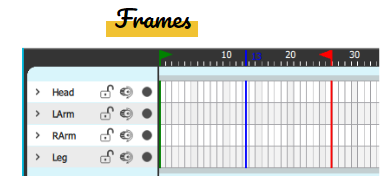
Frames are numbered on the Timeline axis.
|
|
|
Actuators are listed on the left side of the views. They are grouped by limbs: Head, LArm, Rarm, Leg. For both views:
For the Curve view only:
|
|
|
Robot 3D View allows you to preview the current animation and also to modify it.
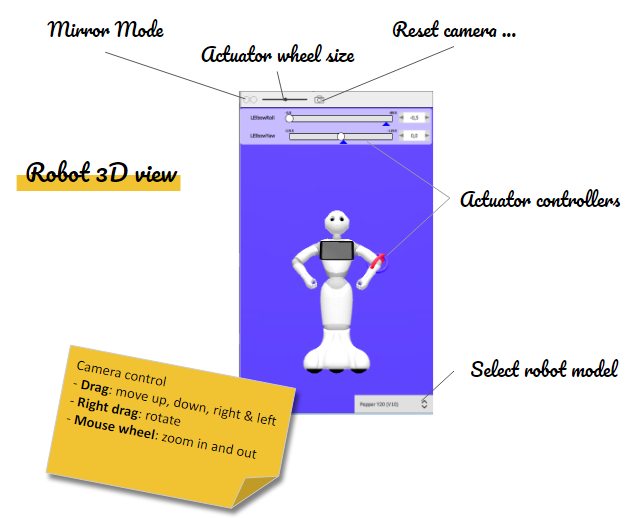
To display the whole robot frontally, use Reset camera in front of the robot button.
Control the camera point of view on the robot:
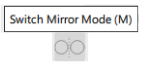
Activate/deactivate the Mirror mode.
For further details, see: Mirror Mode.
Set the thickness of the Actuator Wheels.
Select a robot model.
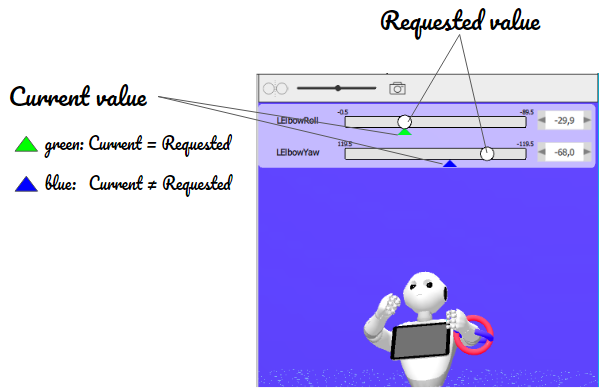
The Slider allows you to adjust the Requested value.
You can move it, as well as enter a value in the associated text box.
The robot tries to reach the command value as soon as possible.
The color of the Current value indicates if the requested value has been reached.
Green means the current value = the last requested value.
Blue means that the current value is not (or not yet) the requested value.
It could be because:
the command execution is still ongoing, or
the joint cannot reach the requested value.
It is the case when there is an obstacle as an other body part or a wall for instance.
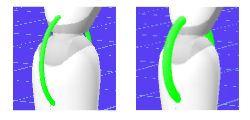
On Robot 3D view, it is possible to activate/deactivate the Mirror mode:
When activated, the slider, let say RShoulderRoll, will also modify
the value of LShoulderRoll.
Tip: pressing the Shift key inverts the Mirror Mode.